Outlook Archive
Archiving old information is an important bit of computer housekeeping that can help your Outlook run faster and more stable as well as help backup valuable legacy information against data loss, destruction or theft.
Click Here for a video tutorial on Archiving in Outlook 2007.
Click Here for a video tutorial on Archiving in Outlook 2010.
Archiving In Outlook 2013
The archiving process in Outlook 2013 is very similar to the 2010 version. Most of the menus have visually changed, however, the functionality remains the same.
Start by opening Outlook 2013 and navigating to FILE > CLEANUP TOOLS > ARCHIVE
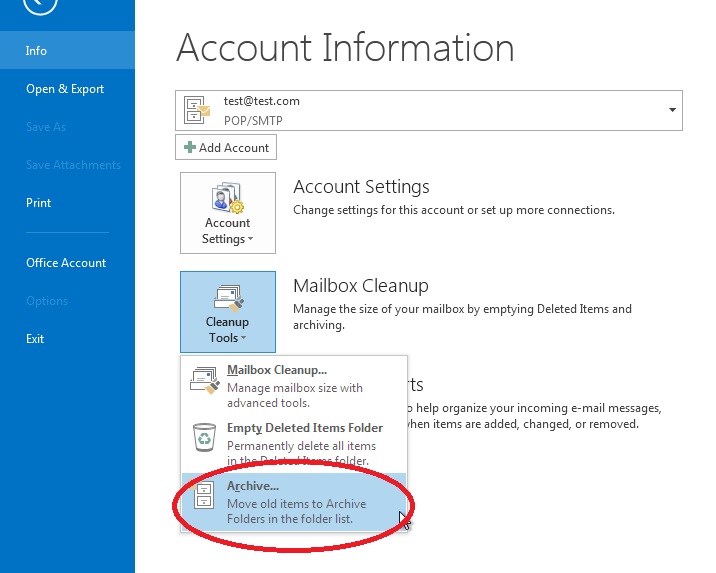
Make sure the Personal Folder you want to archive is selected. Highlight the top of the folder list by clicking on it once.
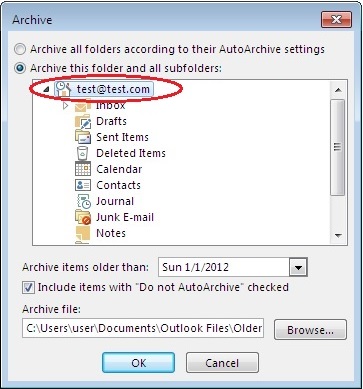
If you prefer to just Archive a single folder, such as your Sent Items or Inbox, simply click and highlight those individually instead of the top of the folder list.
Notice that Outlook says “Items”, and not “Emails”. This is because both email folders AND special folder data will be included in the archive, such as Contacts and Calendar items.
Next, choose a date before which all emails will be archived. All Items older than the date chosen will be removed from your current Personal Folder and saved into a newly created archive folder.
(In the example below, any items older than 1/1/2012 will be moved to this new archive pst file created.)
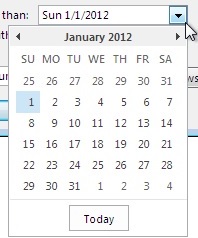
By default, Outlook 2013 will choose the current date minus exactly three months. To choose another date, click the drop down arrow to open Outlook’s date picker.
To navigate in time to select another month, use the date picker’s left- or right-pointing arrow. You can also manually type in a date in the field.
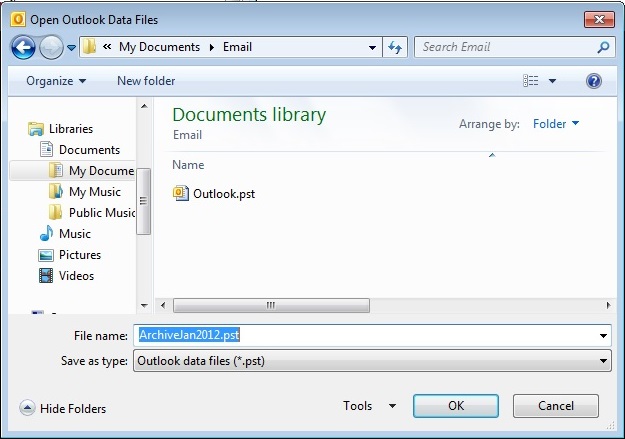
Finally, Outlook lets you choose WHERE to save the archive (PST file), and what to call it. Outlook 2013 will, by default, select the save location as:
C:\Users\[user profile]\Documents\Outlook Files\Archive.pst
This is the same default location where Outlook 2013 will store its personal folder data upon install. If you’d like to save the archive file to another location, click BROWSE and navigate to a local OR network location of your choice.
We also recommend renaming the default Archive.pst to something more cohesive to the date of the items stored in the file. To change the default Archive.pst file name, simply type a new name in the File namefield. (In the example below, we’ve named to file ArchiveJan2012.pst which, at a quick glance, tells us that this file contains data from that date range)
After clicking “OK” on the Archive Window, Outlook2013 will begin the archive process. An Archive Folder will appear in the Personal Folders List and start to populate with the items you’ve chosen to Archive. When completed, you can Close and Re-open this archive.
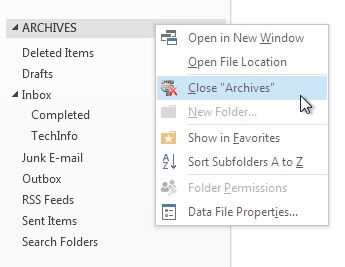
Right click on the Archive Folder and choose “Close Archives”
To reopen this, or any other Archive Folders, navigate to FILE > OPEN & EXPORT > OPEN OUTLOOK DATA FILE
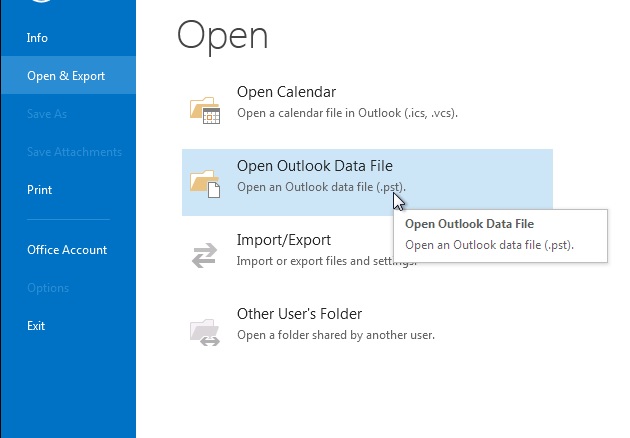
You can then navigate to the location where your Archive(s) are saved. Select a file to open and click “OPEN”. The chosen Archive folder will display back in the Personal Folders list and provide access to those older, archived items.
Archiving In Outlook 2003
Start by opening Outlook and going to File > Archive, the Archive dialog will open, and you should see this,
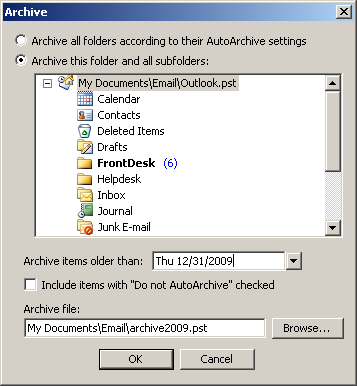
Be sure to highlight the Personal Folders you want to archive by clicking it once.
If you prefer to just Archive a folder such as your Sent Items or Inbox then just simply highlight those folders instead.
Notice that Outlook says “Items”, and not “Emails” this is because both email folders AND special folders data will be included in the archive, such as Contacts and Calendar items.
Next pick the date before which all emails must be archived. ( In this example below any items older than 12/31/2009 will be moved to this new archive pst file created.)
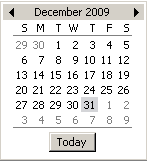
By default, Outlook 2003 will choose the current date minus exactly three months. To choose another date, click the drop down arrow to open Outlook’s date picker.
To navigate in time to select another month, use the date picker’s left- or right-pointing arrow.
Finally, Outlook lets you choose where to save the archive (a PST file), and what to call it. In Windows XP, Outlook 2003 will save the archive file under C:\Documents and Settings\ [yourUserName]\Local Settings\Application Data\Microsoft\Outlook\, as “archive.pst“.
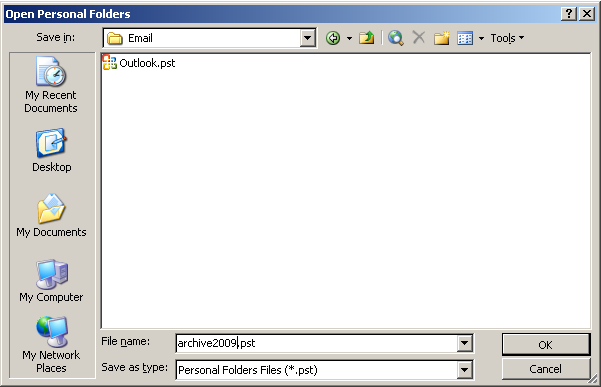
We recommend you save/create this file somewhere you can find it later such as you’re My Documents or Desktop Folder. I always create an Email folder in My Documents and save/create in there and I always rename the achive.pst to something that will better reflect it’s contents such as, 2008-2009.pst or SentItems2009.pst
Click the Browse button, and navigate to the folder you have in mind. To change the default archive.pst file name, simply type a new name in the File name field.
To backup your archived PST files, simply copy them to another location off your hard drive, such as network drive or USB jump/flash drive.
Visit our YouTube page for more Tech Tips, tutorials, and product reviews.
