Step by step guide to repair damage from McAfee Intel VirusScan Enterprise 9226 Dat
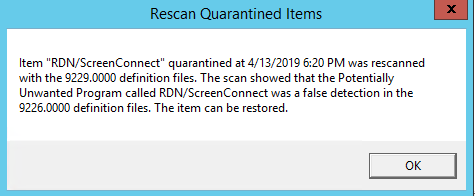
On April 13th 2019 McAfee and Intel release a definition update DAT Version 9226 and another one on April 14 DAT Version 9227 and they did a lot of damage very quickly to many computers. If you look at your Quarantine Manager you will find numerous entries for RDN/ScreenConnect. When you right click these and choose “Check for False Positive” it will display,
Below we have put together a step by step guide that should resolve most of the damage done by this false positive. To begin start by making sure your VirusScan Enterprise is running at least 9229 and has restarted recently.
Step One: Update VirusScan Enterprise and reboot your computer. You can open “VirusScan Console” by looking in your Windows Start Menu under “McAfee”
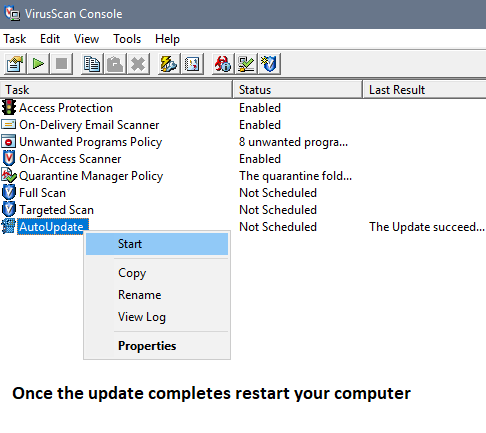
Once your computer has restarted you can check to be sure it is now running DAT Version 9229 or higher by opening “VirusScan Console” found in your Start Menu often under “McAfee” and then choose “Help” and “About VirusScan Enterprise” and it will display the DAT Version.
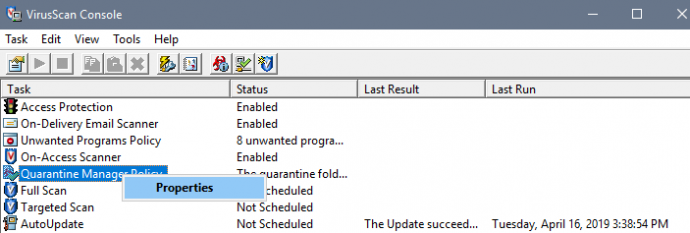
Step 2: Right-Click “Quarantine Manager Policy” and choose “Properties” and then at the top left corner the “Manager” tab.
Next highlight the most recent 20 events and then right-click them and choose restore, you can highlight all 20 at once holding down the ctrl key as you select.
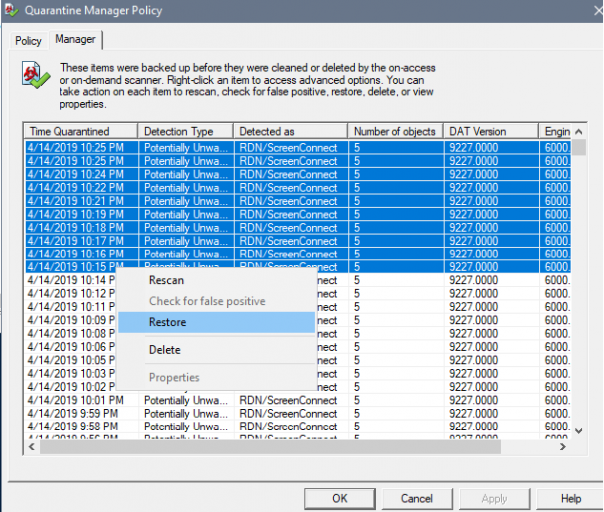
It may take about 4 or 5 minutes to restore these items but once they are complete it will display a message of completion and we can move on to the third and final step.
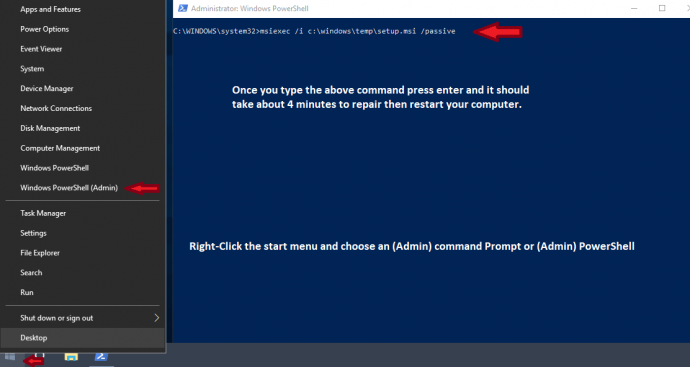
Step 3: Repair the install. This last step involves opening an (Admin) command window and typing one command, Start by Right-Clicking the Windows Start Menu in your bottom left corner of your computer. Here are some screen shots to guide you, the command can be copied and pasted from here to avoid manually typing it if you prefer.
msiexec /i c:\windows\temp\setup.msi /passive
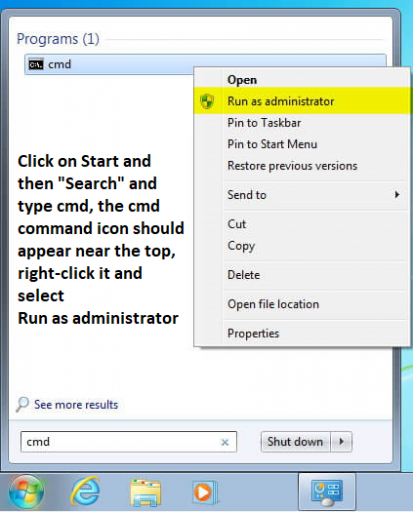
If you are on Windows 7 you can access an (Admin) command window by following these steps,
After completing the final step and logging back in to your computer you should not see anymore VirusScan Messages and if you are please contact your network administrator. You should also notice the return of your support systray icon.
Another method for administrators is to search the registry for a single key for client version 6.9 ( I believe is the only version effected by this false positive ) that causes the Screen Connect client installer to prompt for missing network resources, that key can be found by running the following command from the (Admin) command prompt,
( Backup your own registry before attempting this repair, use at your own risk ) The following command should find a string named “version” have the decimal value of 101274990 other versions of the client have different decimal values.
REG Query HKLM\SOFTWARE\Classes\Installer\Products /V /D /F 101274990 /S
The command should return a response stating the registry folder the key can be found in for example:
HKEY_LOCAL_MACHINE\SOFTWARE\Classes\Installer\Products\D895J_Random_Folder_CFE883C05C0
Next you can delete that key manually or continue with the command prompt, in this example we choose to delete the entire folder the key is found in because the re-install of the client will install to another folder and no longer use this one –
reg delete HKEY_LOCAL_MACHINE\SOFTWARE\Classes\Installer\Products\D995_Random_Folder_CFE883C05C0 /f
Once the client is re-installed and it phones home it should put the client machine back online in the organizational folder it was previously versus showing up as a new machine.